We are in the midst of finishing off several patios in time for the Memorial Day holiday so I thought this would be a good time to share details about the proper way to install polymeric sand, one of the last steps of installing a patio correctly.
I once had a client who created a tropical oasis in her basement, complete with a thatched tiki bar, fake palm trees…and sand, yes – bags and bags of sand! We are always relating indoor features to the outdoors, but aside from her, I can’t imagine many people would want to cover their floor with sand. Why, then, were our crews out on a nice sunny day covering a newly constructed patio with it?
I once had a client who created a tropical oasis in her basement, complete with a thatched tiki bar, fake palm trees…and sand, yes – bags and bags of sand! We are always relating indoor features to the outdoors, but aside from her, I can’t imagine many people would want to cover their floor with sand. Why, then, were our crews out on a nice sunny day covering a newly constructed patio with it?

Sweeping sand into the joints between pavers is the final step in constructing a patio. The sand provides stability, prevents the pavers from shifting, inhibits weed growth and insects. It is typically applied to newly constructed patios with a follow-up application the following year and then topped off only whenever the level drops below the surface of the patio. Too much sand can be messy and problematic.
The sand we typically use is a special blend known as polymeric sand, which contains a silicon based adhesive that binds the grains together, offering better protection. It is recommended in ICPI (Interlocking Concrete Pavement Institute) guidelines and offered by most contractors but there is a process that must be closely followed and done correctly for proper results and to prevent damage. We are very particular about the brand of product we use and the steps we follow.

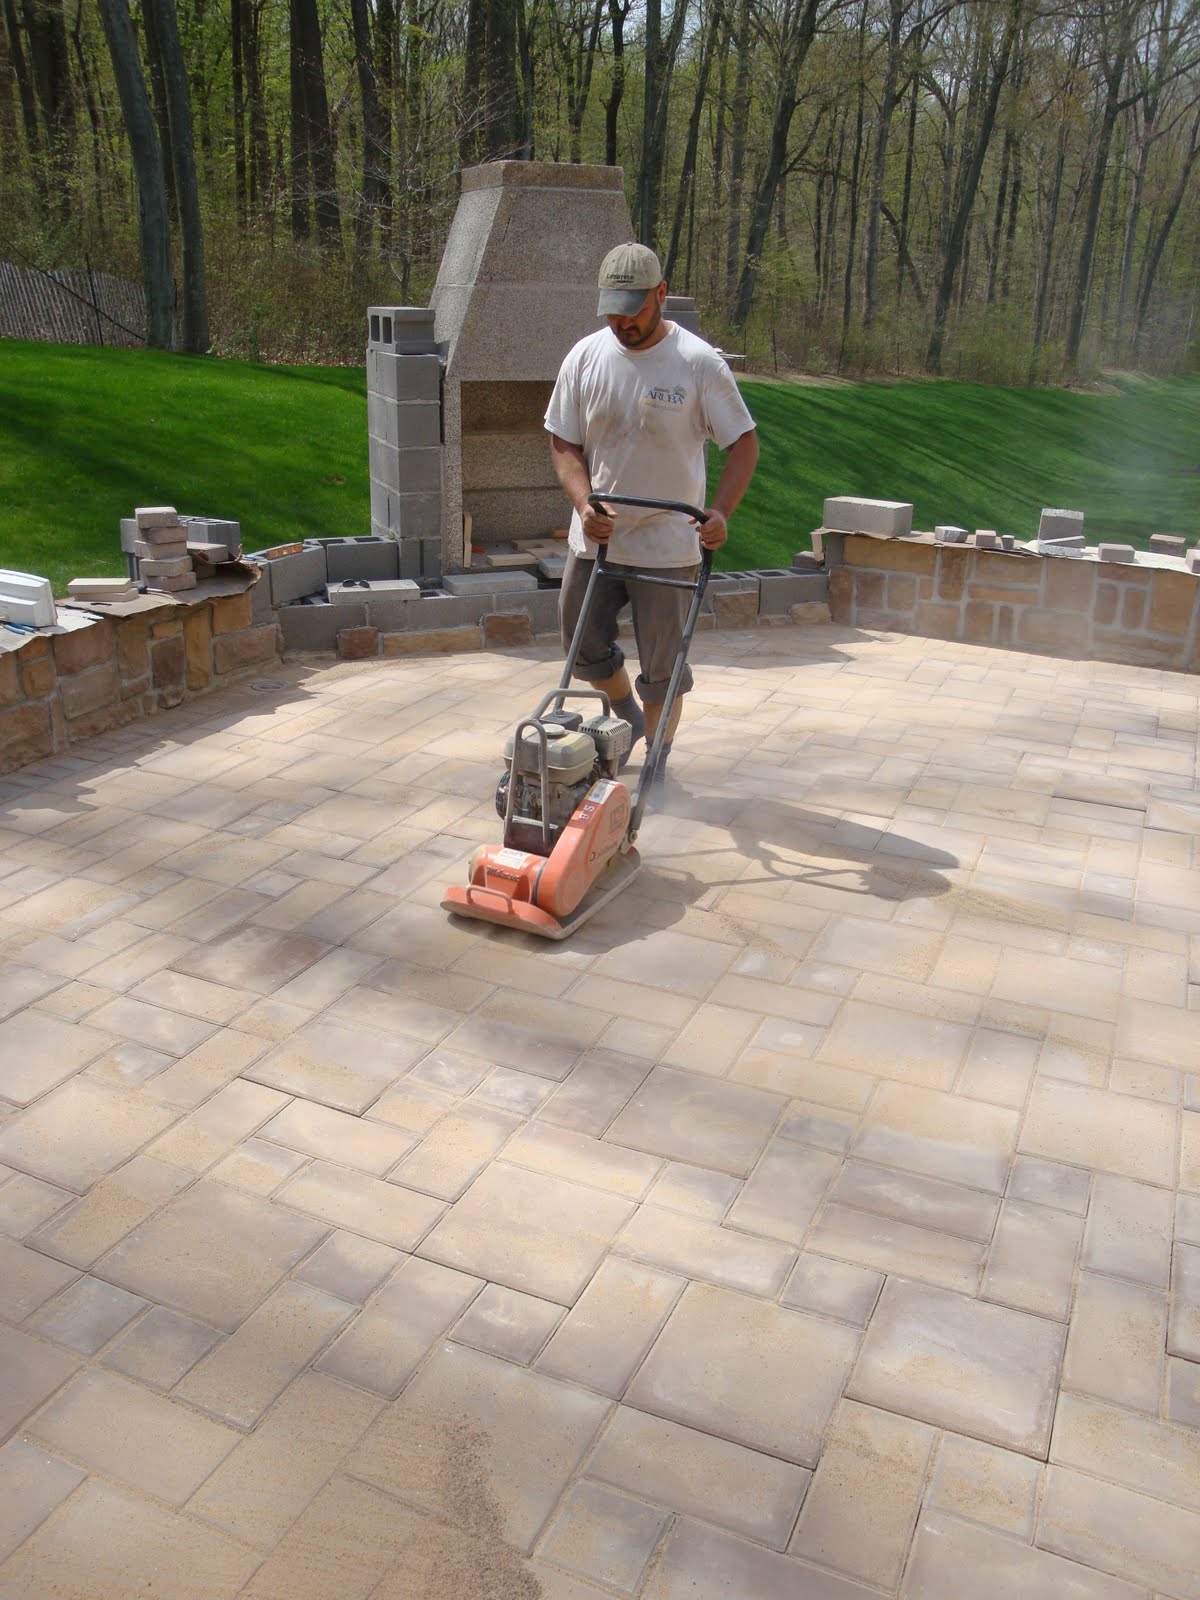
Sanding the patio has to be done on a very dry day and not until the morning dew has dried from the surface to prevent the sand from sticking where it isn’t wanted. The sand is dumped onto the patio and swept around to fill in the joints. Once the joints appear filled, a plate compactor is run over the surface. This heavy piece of equipment vibrates, settling sand deep into the joint. A second application is made, compacted again and then the excess material is blown off the patio. Once the surface is entirely free of excess sand, the entire patio is gently misted with water in order to slowly and evenly dampen the sand in the joints, activating the silicon gel. After twenty four hours the material is cured and the patio can be used.

Poor quality product or failure to follow these steps can result in stains on the pavers and improper curing of the sand such as we saw on a recent project installed by another contractor that we were asked to re-do for the client. This project was plagued with problems (and will probably be featured in a future post) but what bothered the homeowner most was the excessive amounts of sand held together in a rubbery mass that crumbled and tracked around the patio, getting into the house and pool.

Don’t let poorly done sanding details ruin your patio, carefully follow product directions or hire a knowledgeable professional to ensure that time spent on your patio will be better than a day on the sandy beach!
A Professional Stone Patio adds lasting beauty, durability, and value to your home. Expertly designed and installed, it creates a functional outdoor living space perfect for gatherings or relaxation. With quality craftsmanship and natural stone, it ensures both style and strength for years to come
ReplyDelete